The stances with a gun I’ve modified:
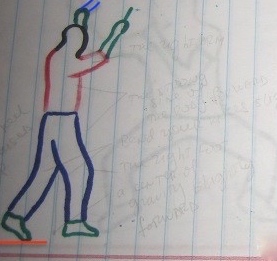
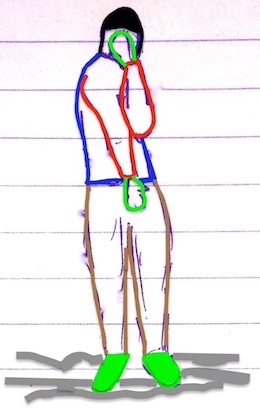
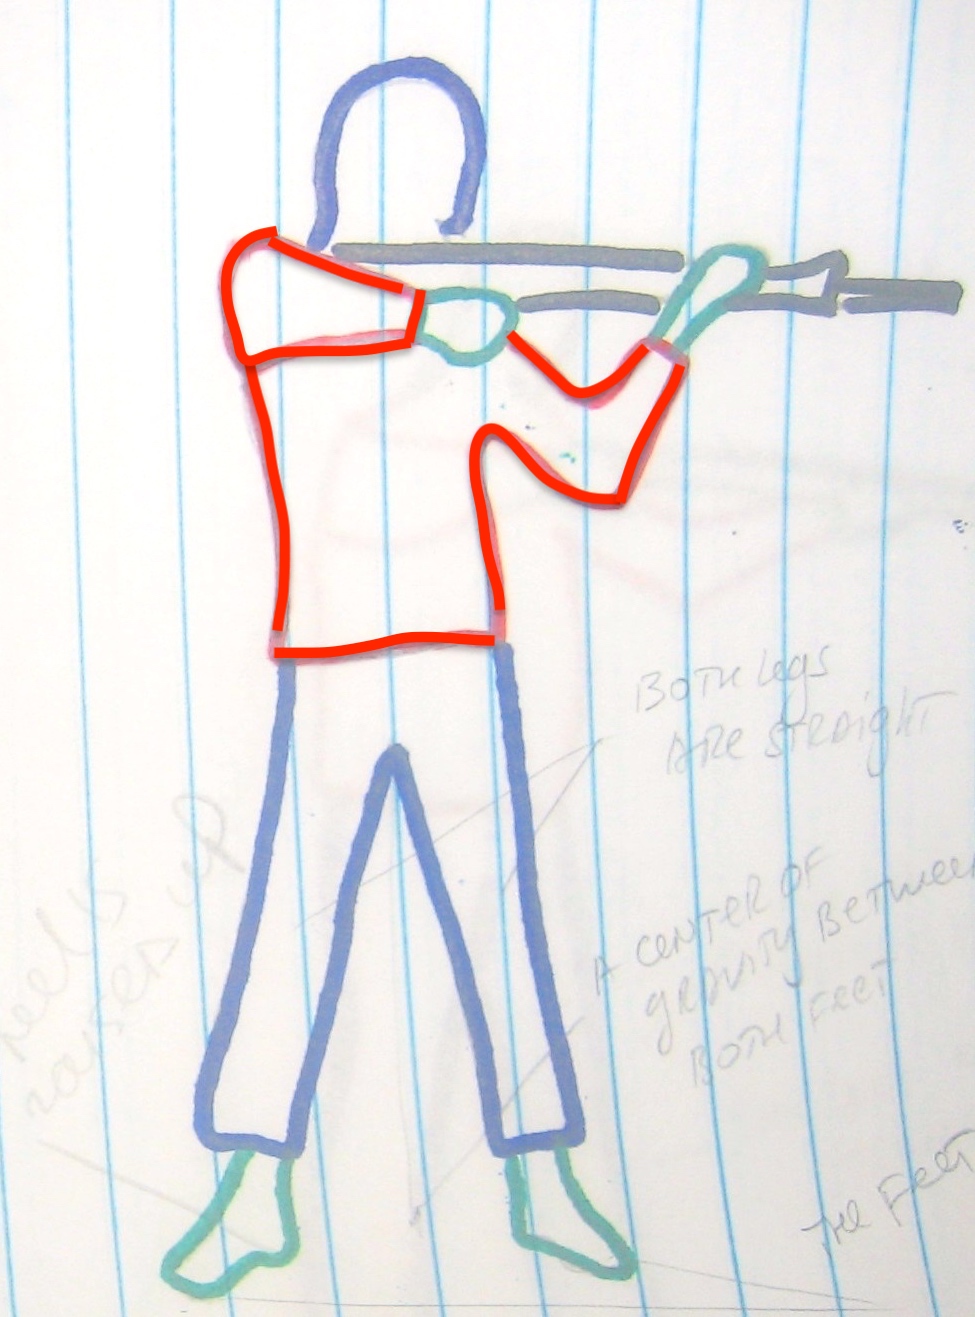
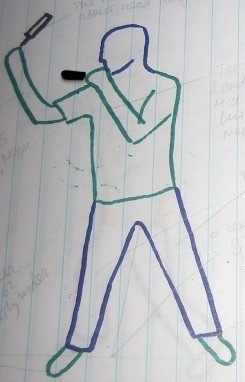
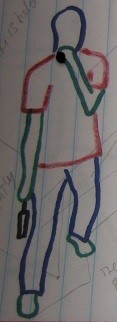
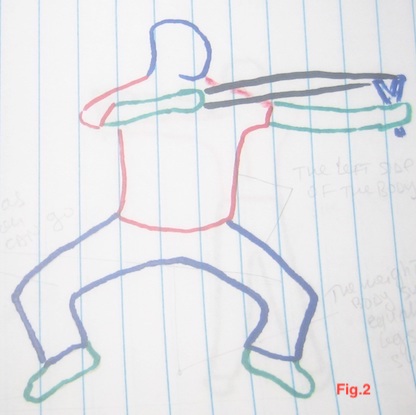
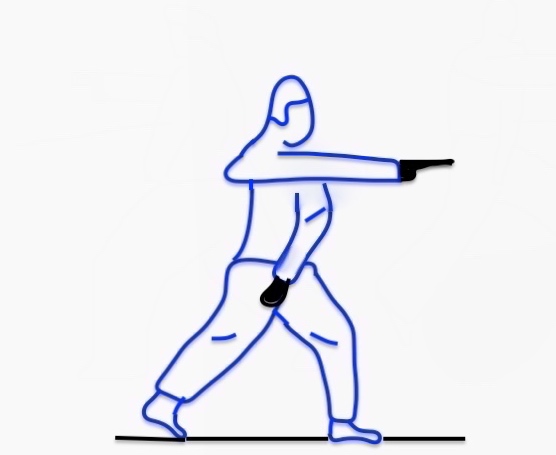
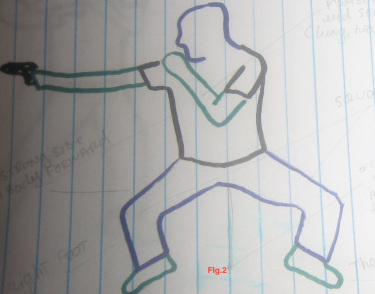
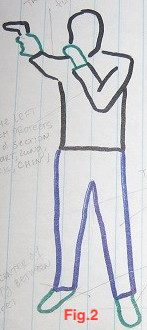
The modified “horse stance” (Kiba-dachi) with the pistol
![NET4[1] 2.jpg](https://hardfightmartialart.files.wordpress.com/2019/03/net41-2.jpg)
- Stretch out the arm holding the gun towards the opponent
- Both feet are parallel
- A center of gravity between both feet
- Both feet should be about the shoulder width
- The left arm protects the mid-section and head. This stance might be the ready stance for any direction especially when the dominant arm holding the pistol strongly flexed.
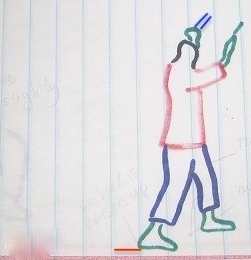
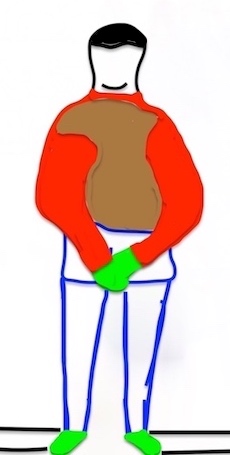
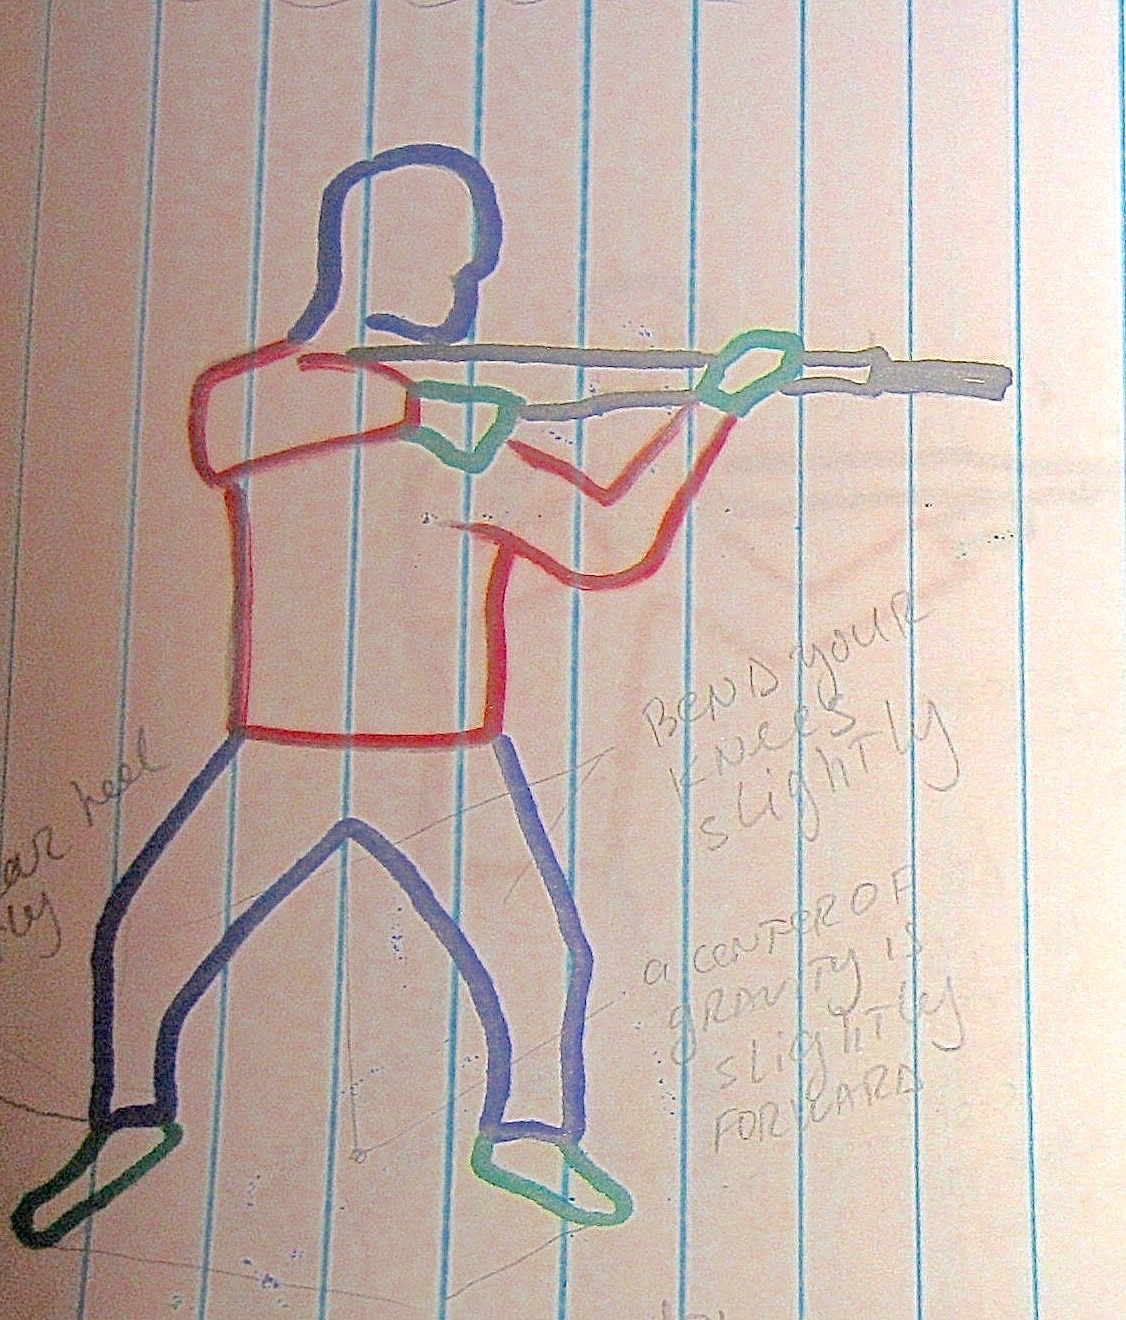
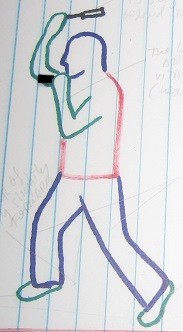
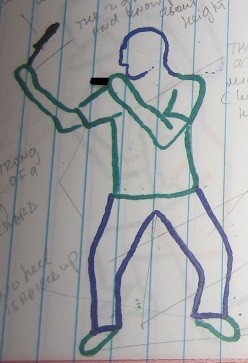
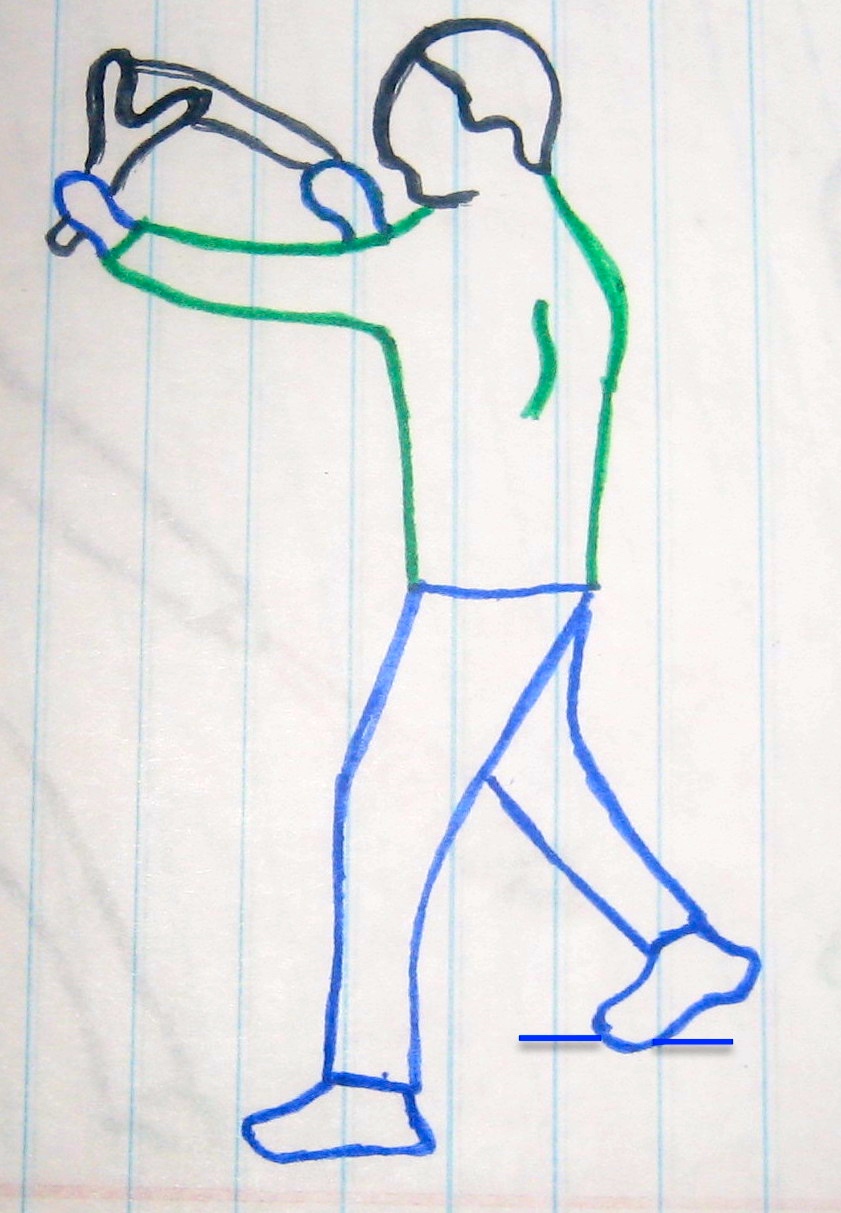
The front stance
![NETPHOTO[1].jpg](https://hardfightmartialart.files.wordpress.com/2019/03/netphoto1.jpg)
- Bend your knees slightly
- A center of gravity slightly forward
- The rear heel slightly lifted up
- The feet are set shoulder width
- The right foot forward
- The strong side of body forward
- The left arm (the back hand) protects the mid-section and head
- The pistol towards the ground
The front stance with a pistol (the right foot forward)
- Bend your knees slightly
- A center of gravity slightly forward
- The rear heel slightly lifted up
- The feet are set shoulder width
- The right foot forward
- The strong side of body forward
- The left arm (the back hand) covers the back side of body and groin
- The pistol towards the target
The front stance with pistol (the left foot forward)
- Bend your knees slightly
- A center of gravity slightly forward
- The rear heel slightly lifted up
- The feet are set shoulder width
- The left foot forward
- The weak side of body forward
- The left arm (the back hand) covers the back side of body and groin
- The pistol towards the target
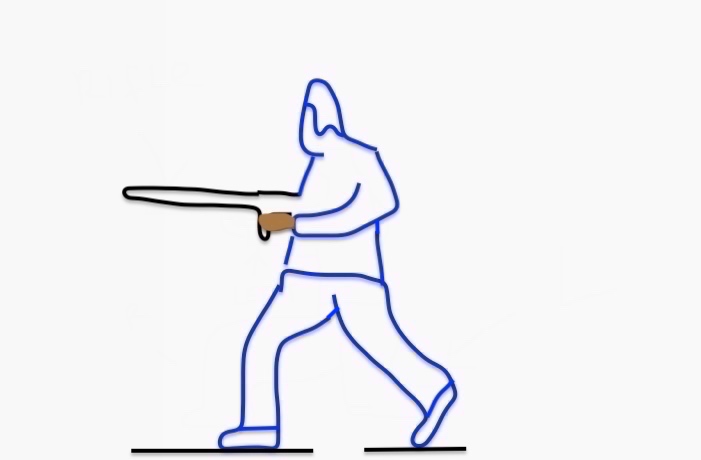
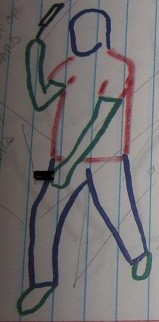
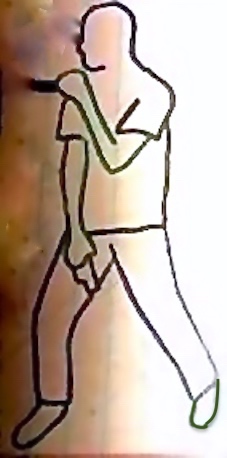
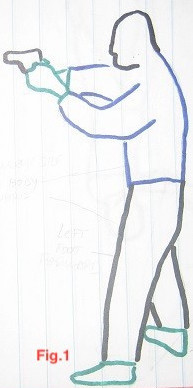
The natural stance with a pistol
![nephot[1].jpg](https://hardfightmartialart.files.wordpress.com/2019/03/nephot1.jpg)
- The legs gathered together
- A center of gravity between both legs
- The feet are set shoulder width
- The left arm (the back hand) covers the mid-section and head
- The pistol towards the target
- Toes outward at 45-degree angles
- The legs are straight
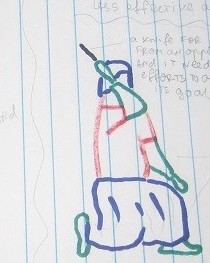
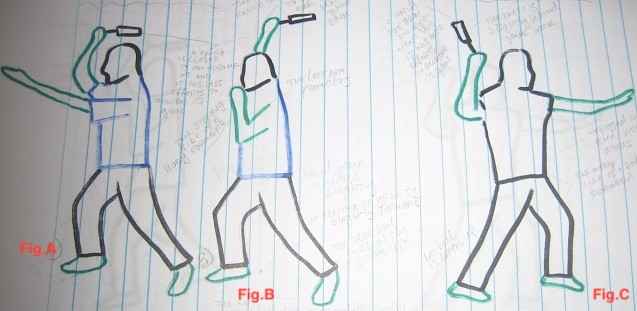
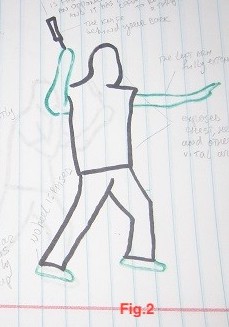
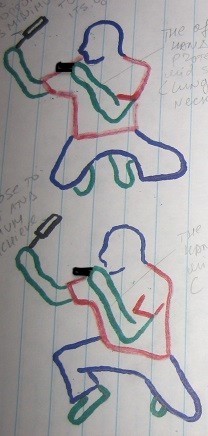
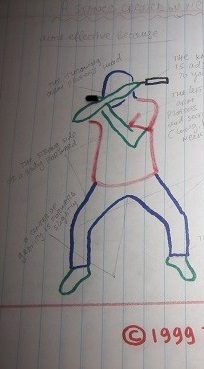
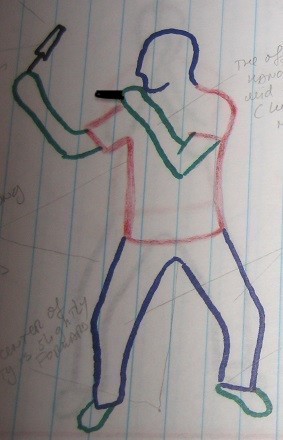
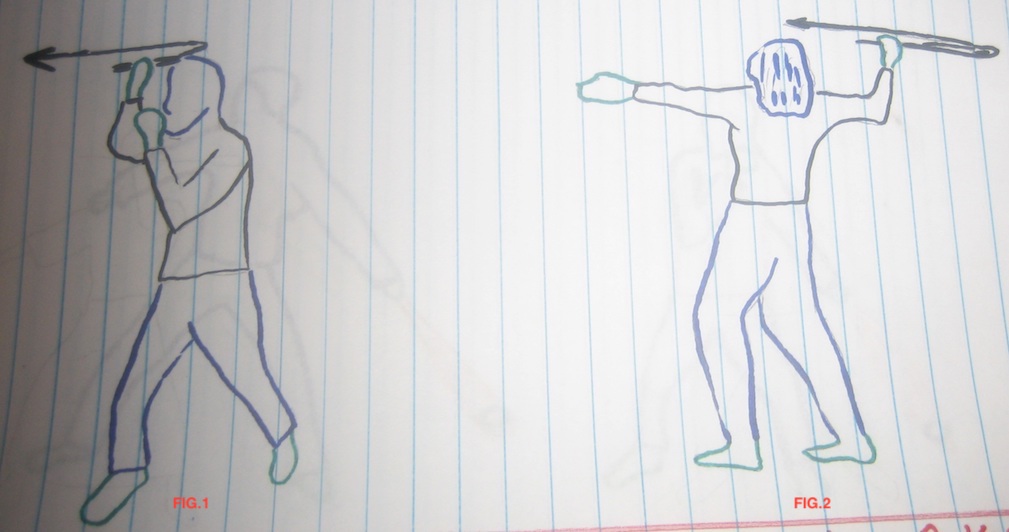
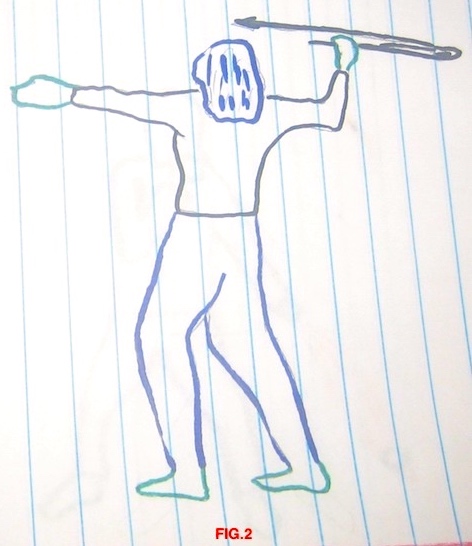
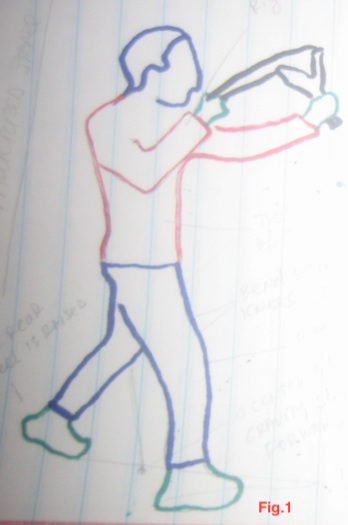
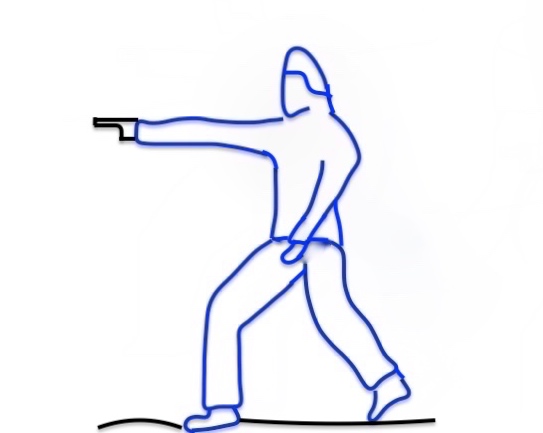
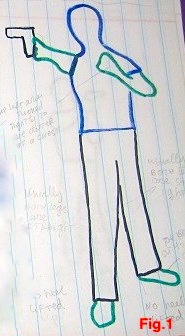
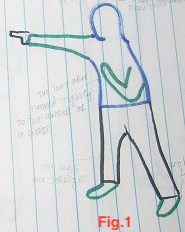
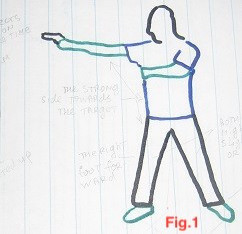
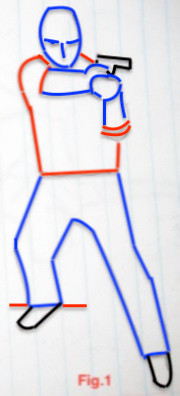
A one of the most ineffective stances of a concept called “mixed ineffective techniques of all martial arts”

1.The left arm fully extended as far as you can. This stance allows practitioner minimum reach because his pistol is held in the hand maximum far from an opponent
2.The gun position about chest height
3.A center of gravity supported equally by both legs or the majority of weight is on the left leg
4.The feet are set shoulder width
5. Bend your knees slightly
6.The right arm extended as far as you can
7.Toes outward at 45-degree angles
Note: If you will apply the most ineffective hold explained above you will waste more time to make effective knife hold to be able to stab or slash the target.
The front stance

- The rear heel slightly raised up
- A center of gravity slightly forward
- Bend your knees slightly
- The strong side (right) of body towards the target
- The left arm protects mid-section (lung, heart, neck)
- The right arm fully extended
- The feet are set shoulder width apart
The side stance

- The off hand protects mid-section (lung, heart, neck)
- Bend your knees slightly
- A center of gravity between both feet or slightly forward
- The rear foot flat on the floor
- The feet should be about shoulder width
- The strong side of body forward
- The right foot forward
- The right arm fully extended
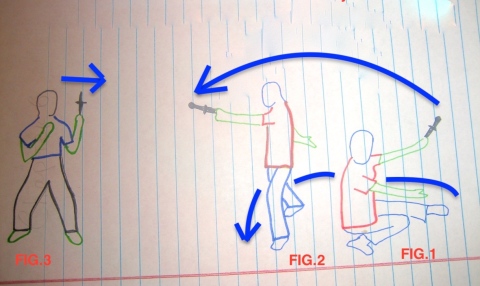
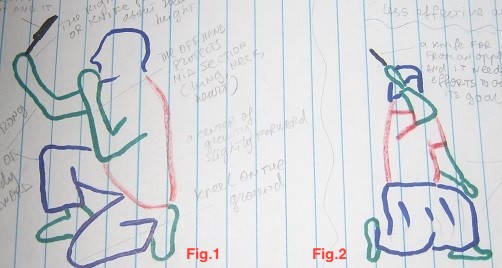
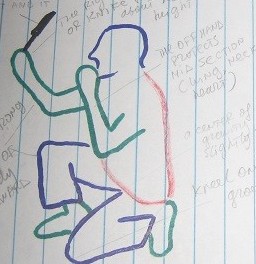
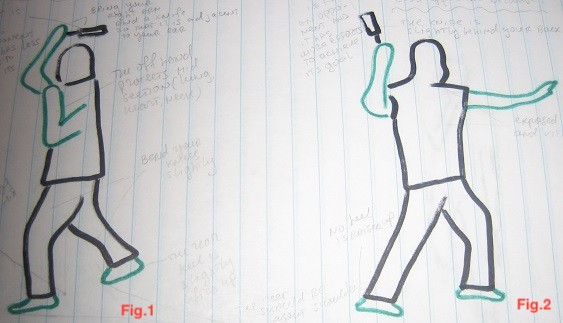
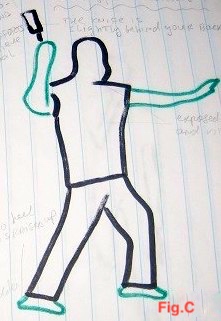
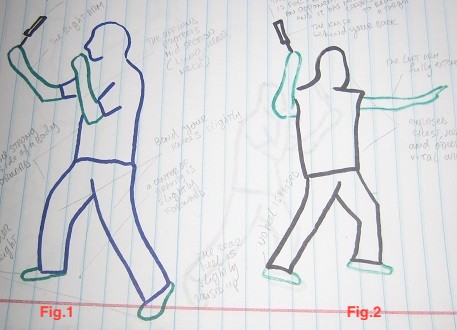
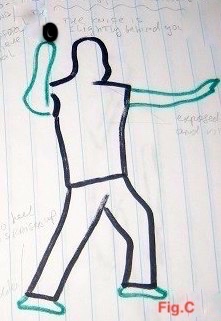
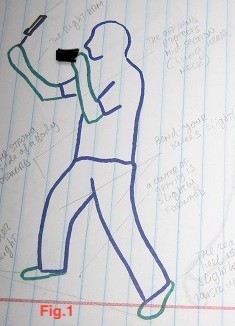
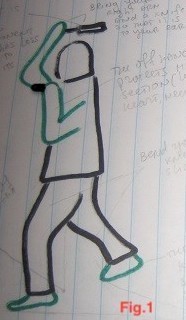
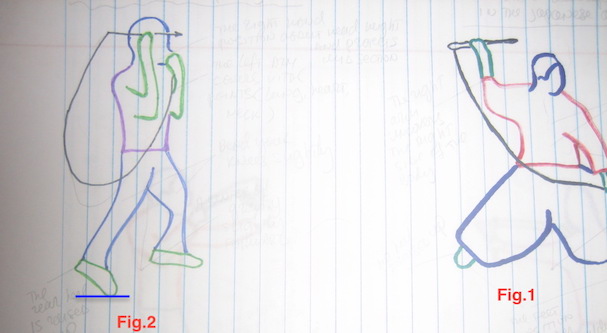
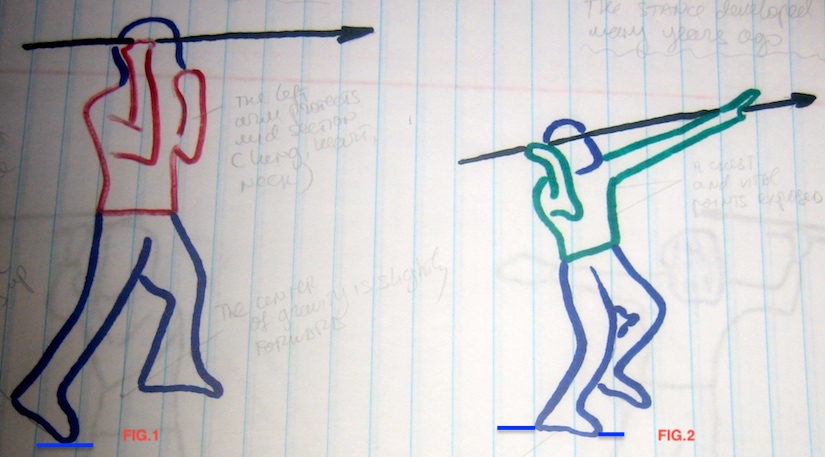
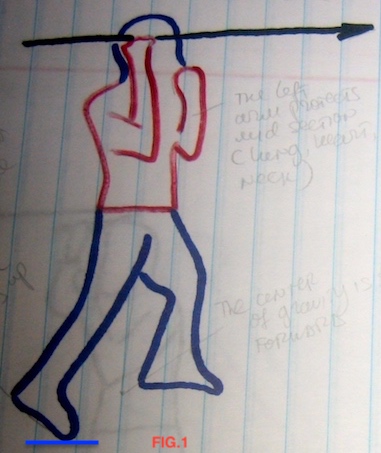
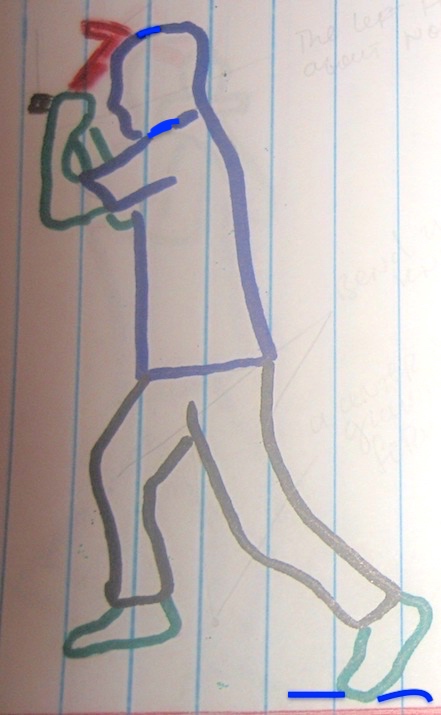
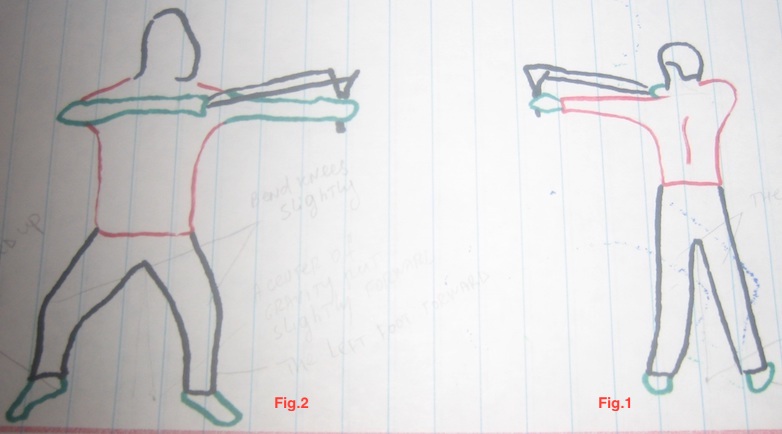
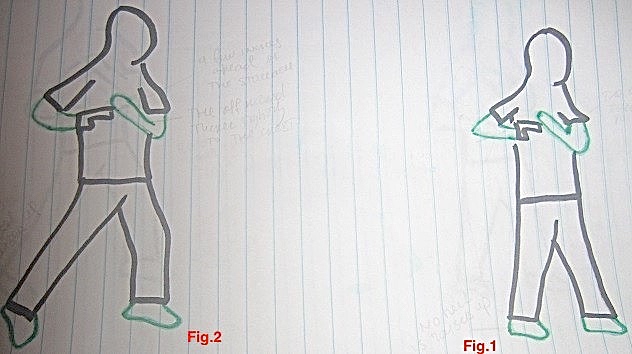
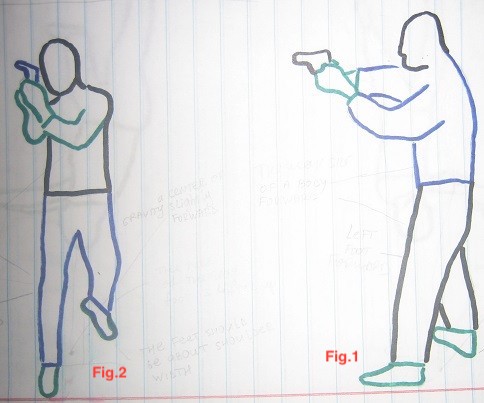
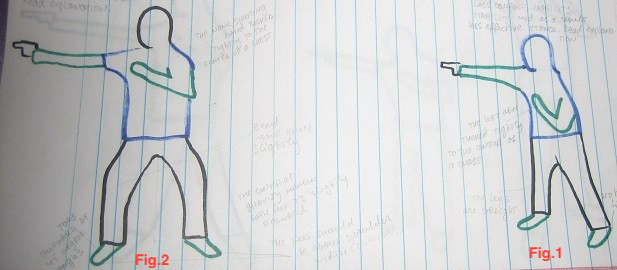
Compare a way of shooting in hardfight (Fig. 1 and 2…a concept called ” mixing the ineffective techniques of all martial arts”) with Fig.3.
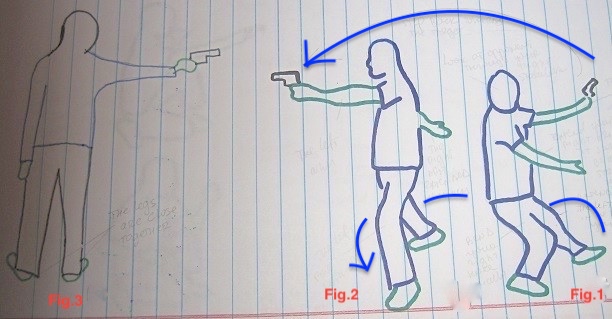
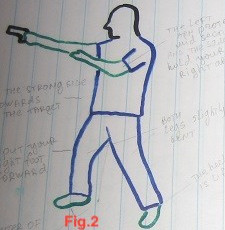
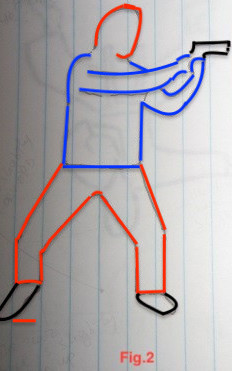
A way of shooting a pistol relating to a concept called ” mixing the medium techniques of all martial arts”.
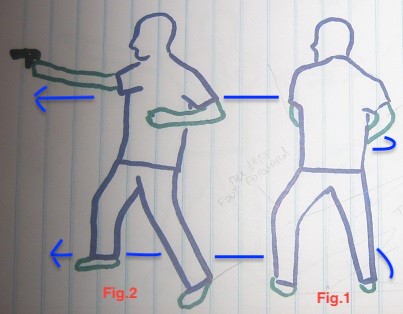
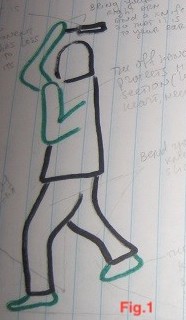
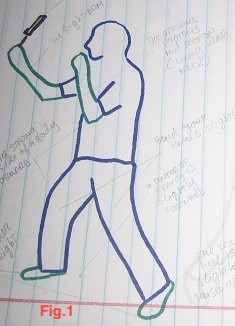
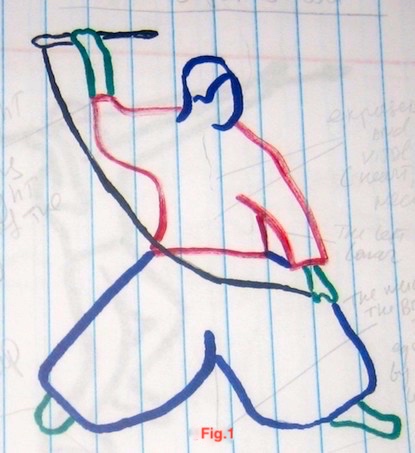
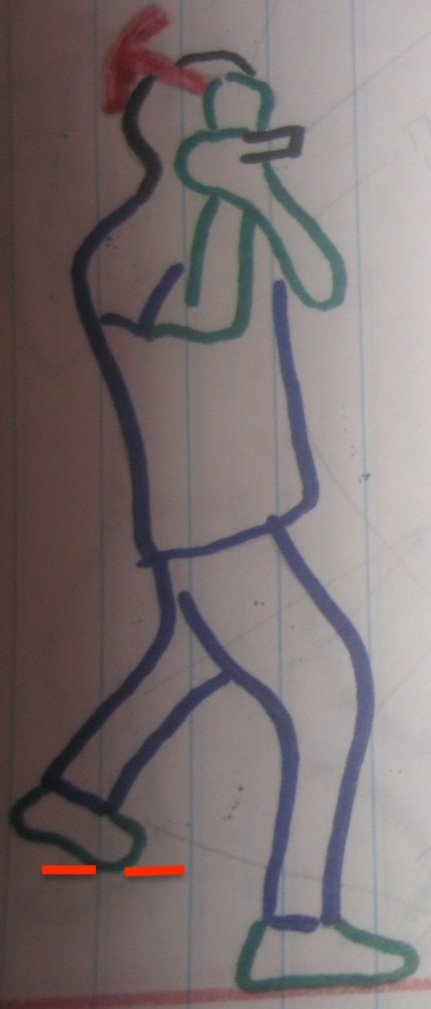
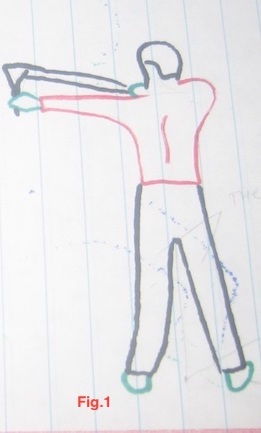
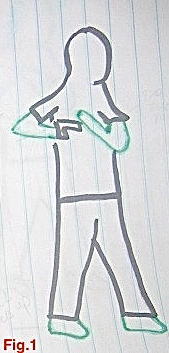
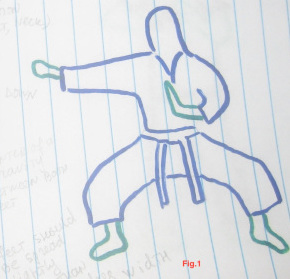
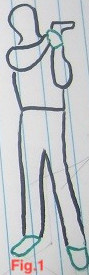
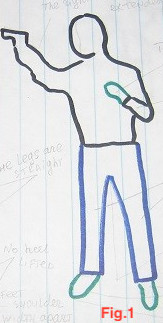
Fig.1:
- Bend your knees normally (medium)
- The weak side (left side) of body forward
- Toes are parallel (or toes outward at 45-degree angles)
- A center of gravity between both feet
- Bring your right hand with the pistol so that it is adjacent to your hip.
- The left-hand position about the gun height
- The feet should be about shoulder width. See also Figure 1
Figure 1
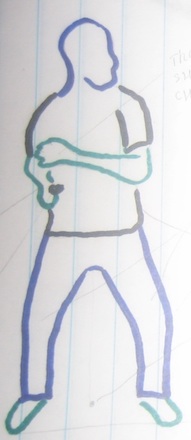
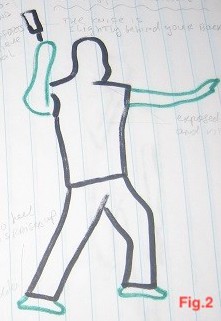
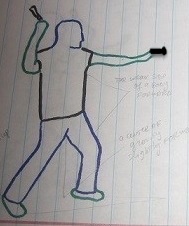
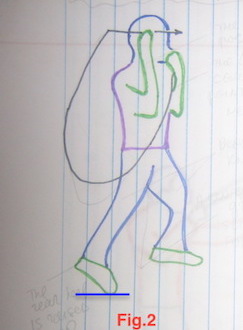
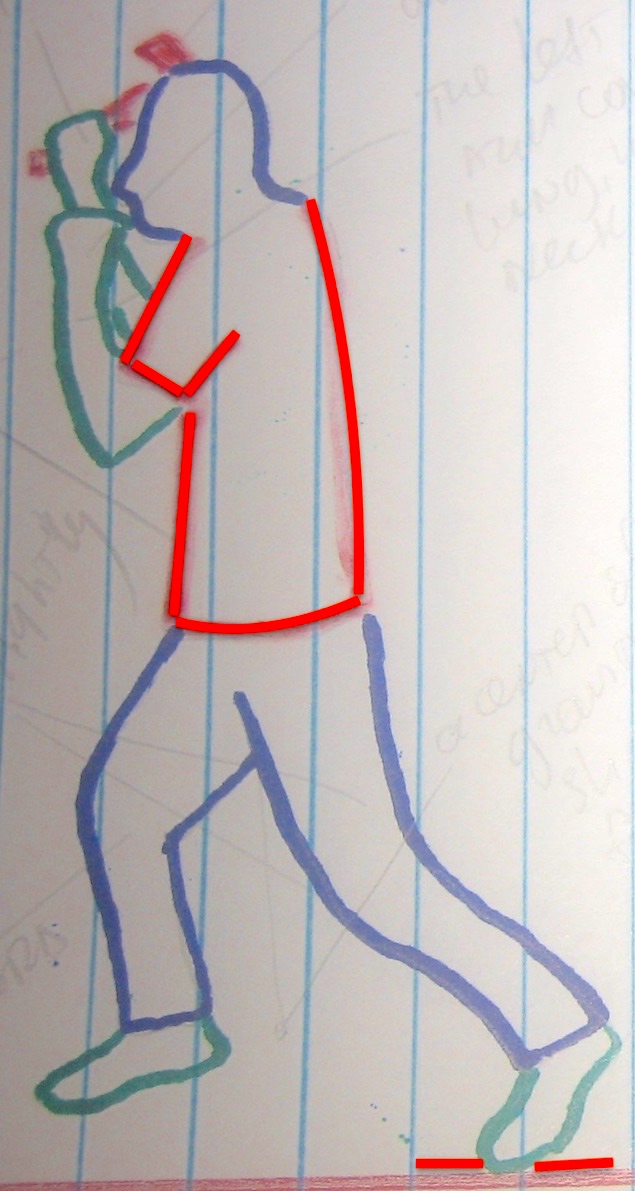
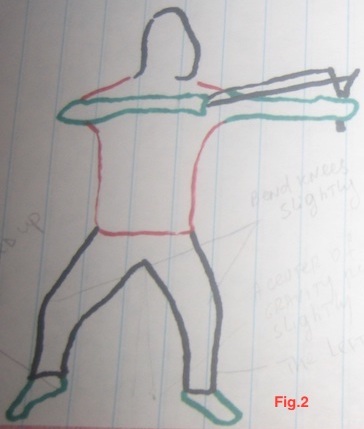
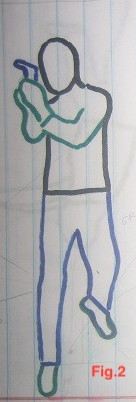
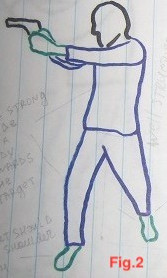
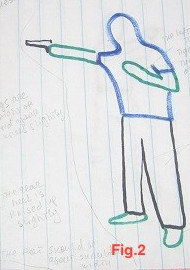
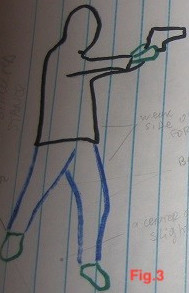
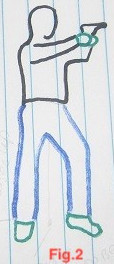
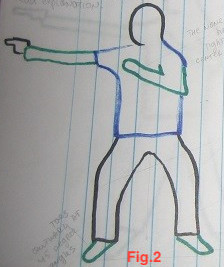
Fig.2:
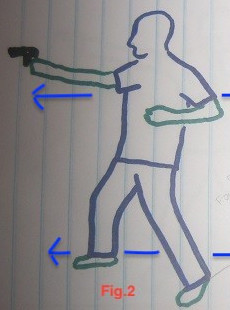
- Pivot your body and step with your right foot.
- The right hand with the gun should move towards the target as you pivot assuming the front stance with the left arm position about the chest height.
- The right hand with the pistol extended towards the target. The rear heel slightly lifted up.
- The feet are set shoulder width. Bend your knees slightly.
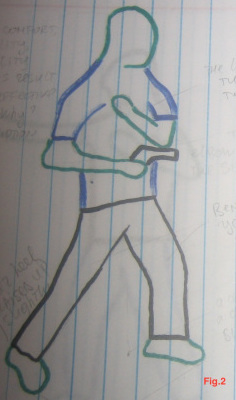
Compare the modified stance (Fig.2) with a stance used before (Fig.1)
More comfort, stability, and mobility. Therefore, it is more effective stance. See Figure.2
Figure 2

Because:
- The leading hand tucked tightly to the center of chest
- The gun arm elbow tucked tightly into the side of the body
- The rear heel slightly lifted up
- The feet are set shoulder width
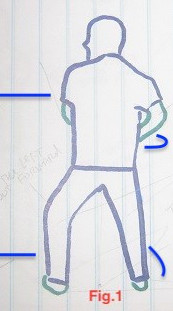
Less effective because:
Figure 1
- The legs are straight
- No heel is raised up
- The weight supported equally by both legs
Compare the modified stance (Fig.2) with a stance used before (Fig.1)
See Figure 2:
1. The strong side (right side) of body forward
2. A center of gravity slightly forward
3. The feet should be about shoulder width
4. The right foot forward
5. Bend your knees slightly
6. The rear heel slightly lifted up
7. Both hands with the pistol (the left arm partially extended) extended towards the target
Notice: well-structured stance
See Figure 1:
Less effective because:
1. No heel is raised up
2. The legs are straight
Notice: not well structured stance
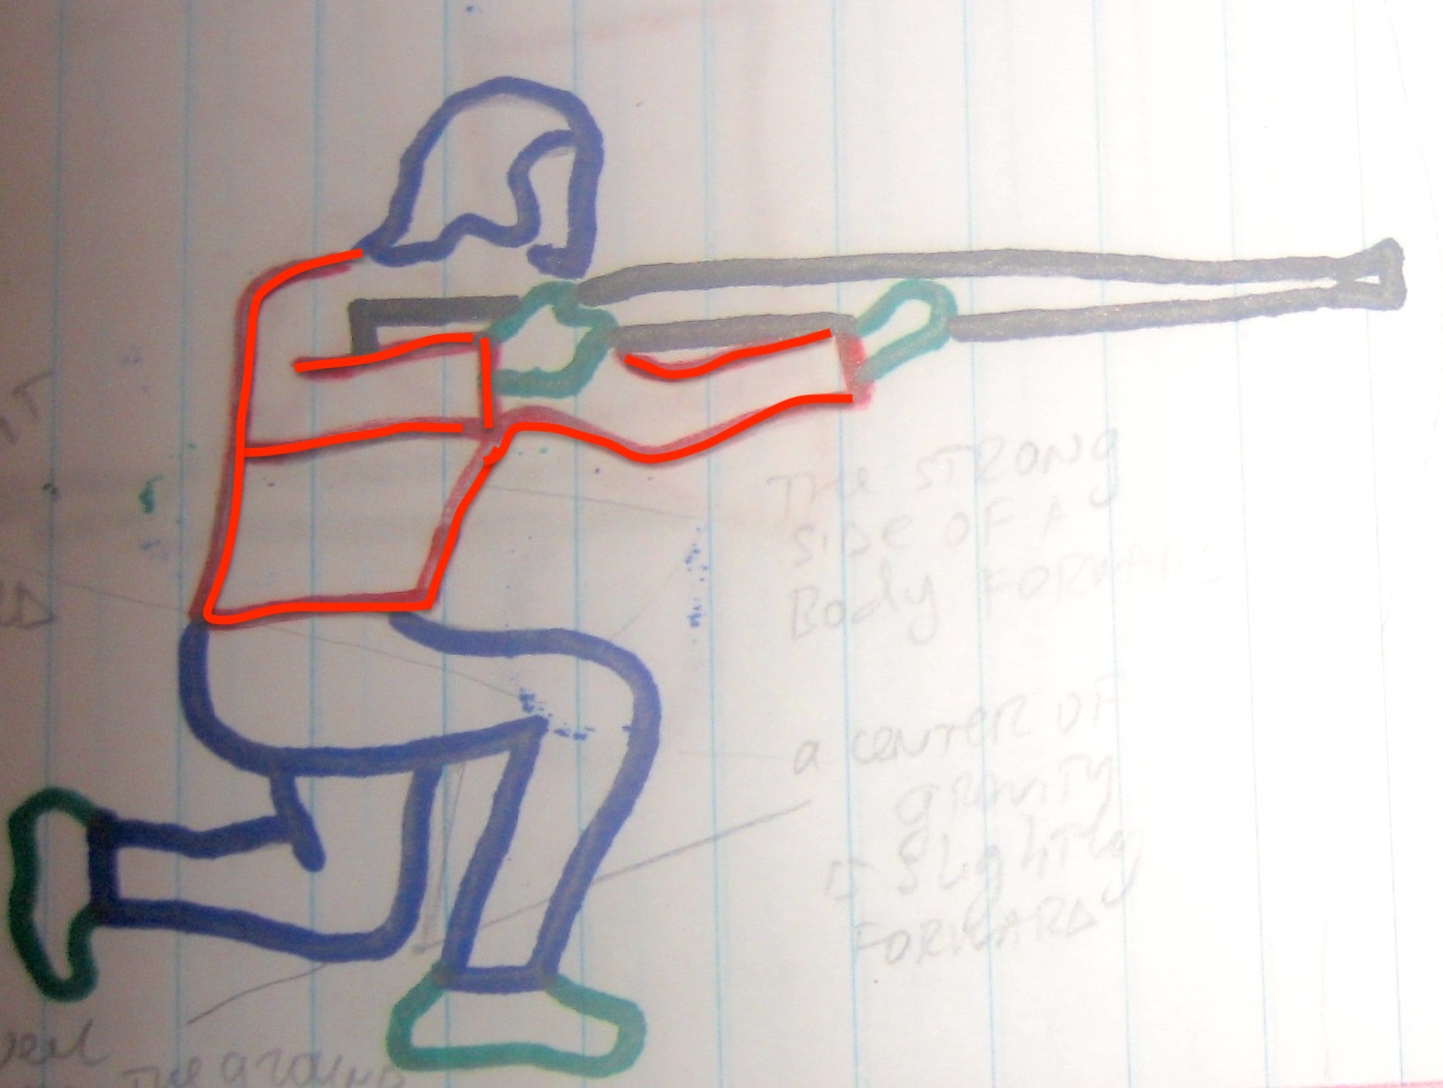
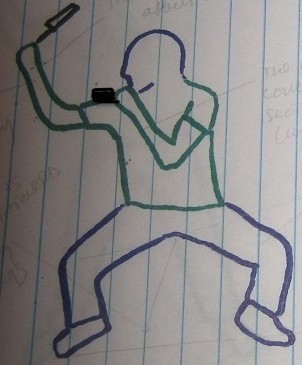
The modified stance ( Fig.2). Compare it with a stance in Karate (Fig.1)
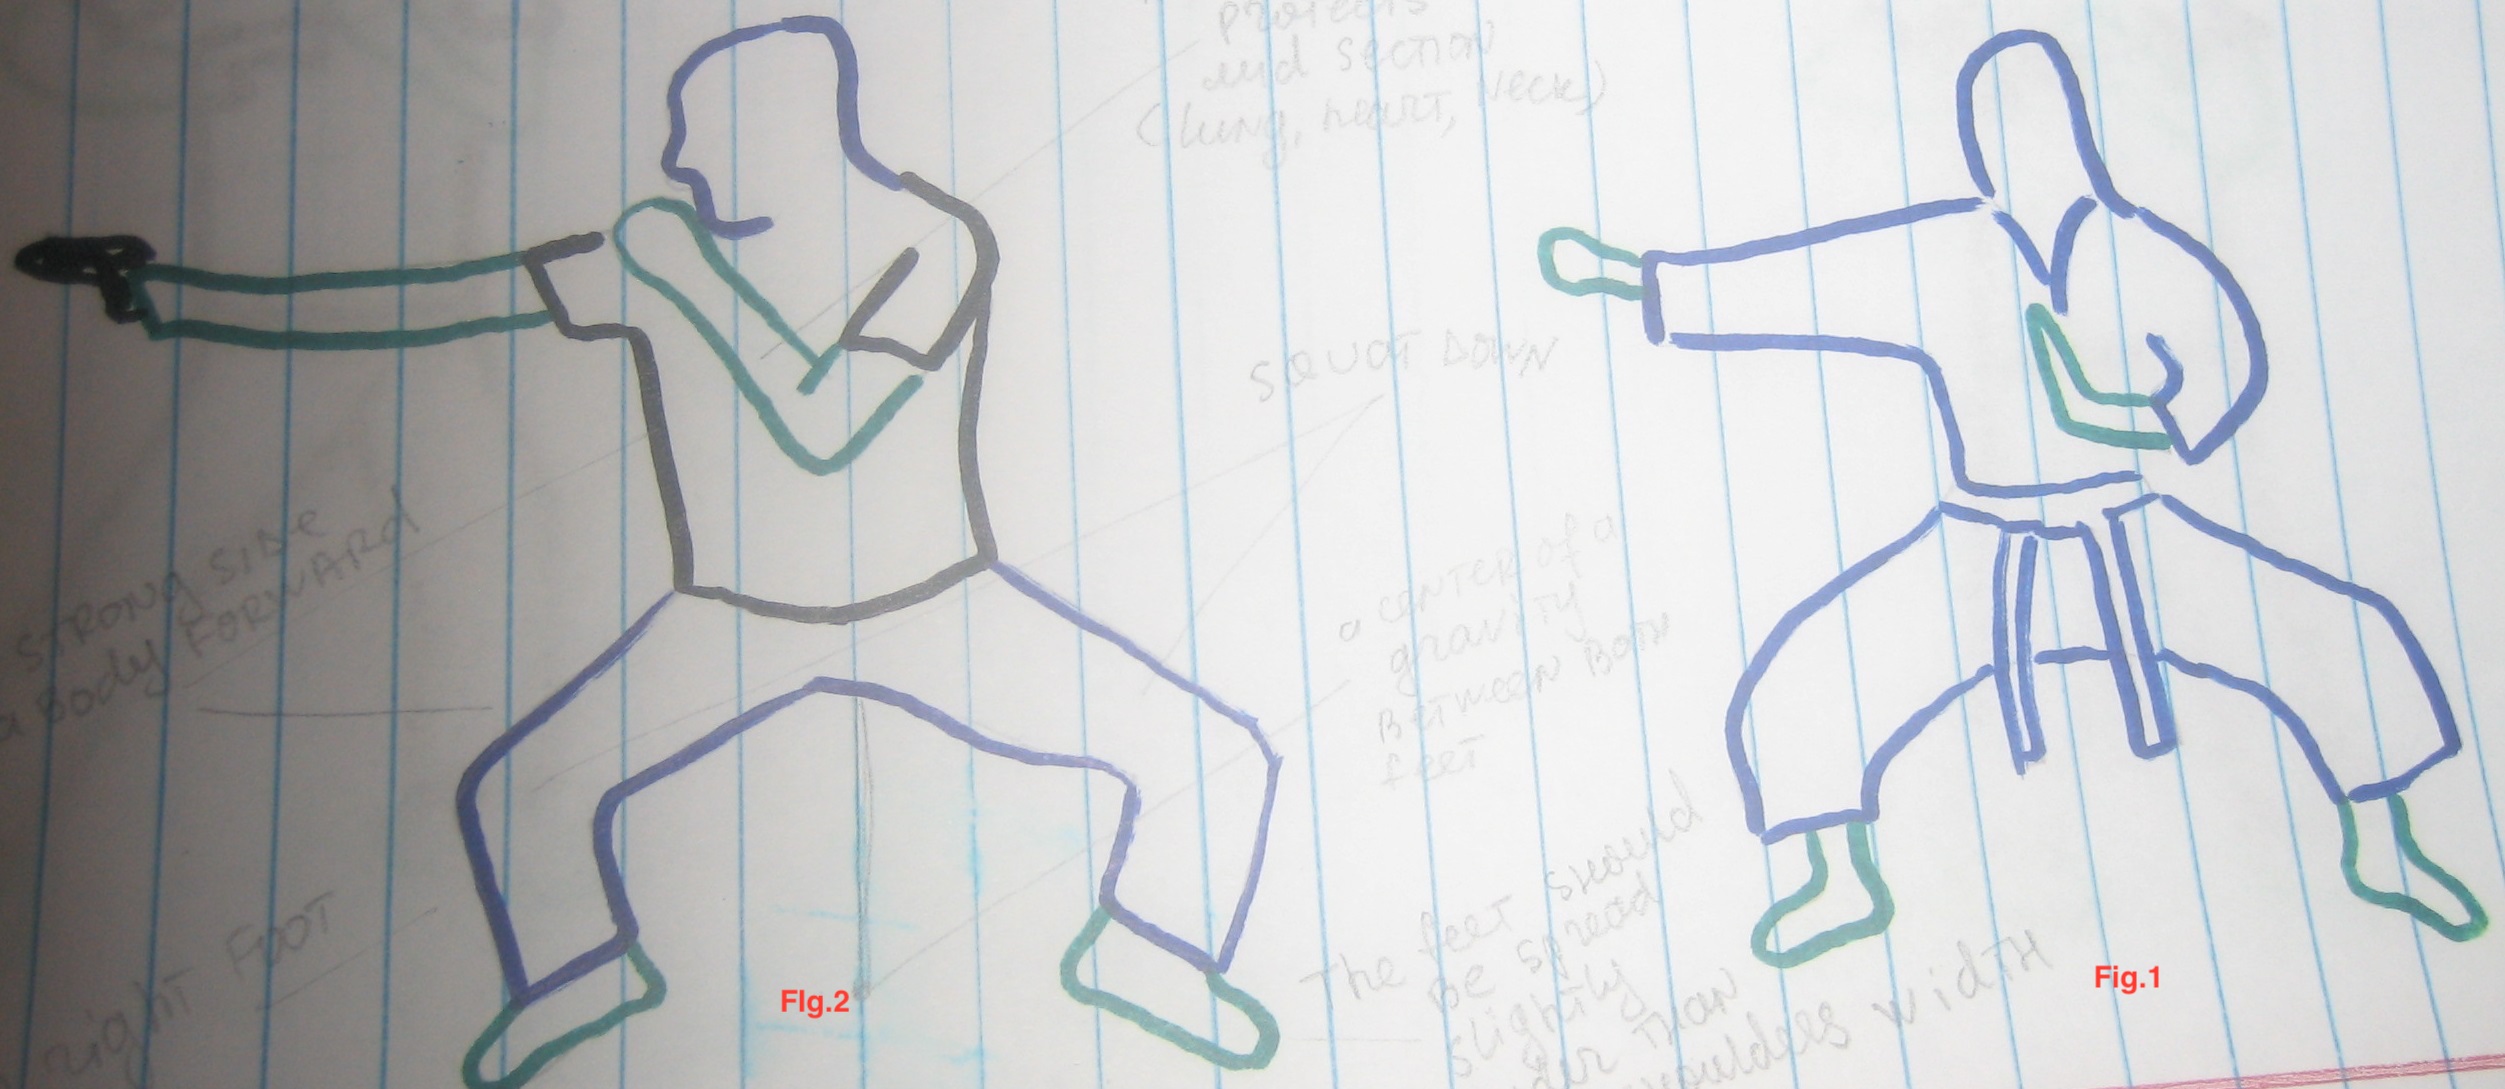
Figure.2
- Squat down
- The left arm protects mid-section (lung, heart, neck)
- The strong side of the body forward
- The right foot forward
- The right hand with the pistol fully extended
- The weight supported equally by both feet or slightly forward
- The feet should be slightly wider than shoulder width
The stance in Karate (See Figure. 1)
Figure 1:
Compare the modified stance (see Fig.2) with a stance used before (see Fig.1)
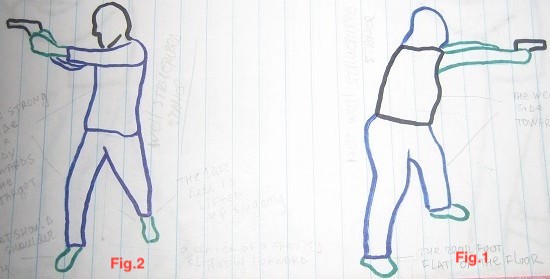
Figure.2
- The rear heel slightly raised up
- A center of gravity slightly forward
- The feet are set shoulder width
- The strong ide ( right side) of body forward
- Both hands with the gun fully extended towards the target
Figure 1
See the difference:
- The weak side (left) of body forward
- The rear foot flat on the floor
The modified stance (Fig.3). Сompare with stances used before ( Fig. 2, 1 )
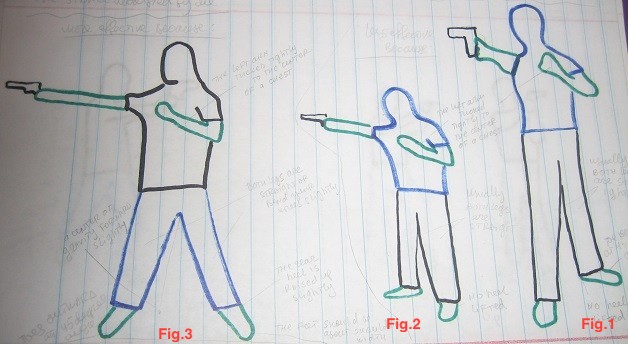
Figure. 3
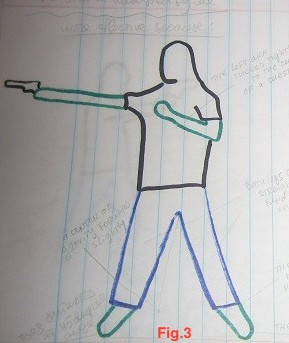
More effective because:
- Toes outward at 45 degree angles
- A center of gravity slightly forward
- Bend your knees slightly or both legs slightly straight
- The left arm tucked tightly to the center of the chest
- The feet are set shoulder width or slightly wider
- The right hand with the pistol extended towards the target
Figure 2 or the stances developed many years ago
Less effective because:
- No heel is raised up
- Usually, legs are straight
Figure 1
- The legs are straight
- The left toe at 45 degree angles
- No heel is raised up
Compare the modified stance (Fig. 3) with stances developed before ( Fig. 2 and Fig.1)
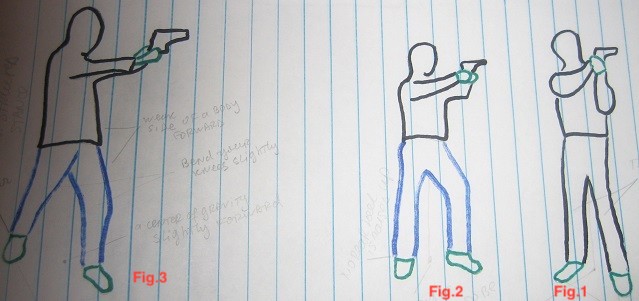
Figure 3
- The weak side of body forward
- Bend your knees slightly
- A center of gravity slightly forward
- The rear heel slightly raised up
- The feet are set shoulder width
- Both hands with the gun extended in the front of you
Notice: well-structured stance
Figure 2
- The weight supported equally by both legs
- No heel is raised up
- Notice: not well structured stance
Figure 1
- legs are straight
- The feet are close together
The modified stance (see Fig. 2). Compare it with a stance created before (see Fig.1)
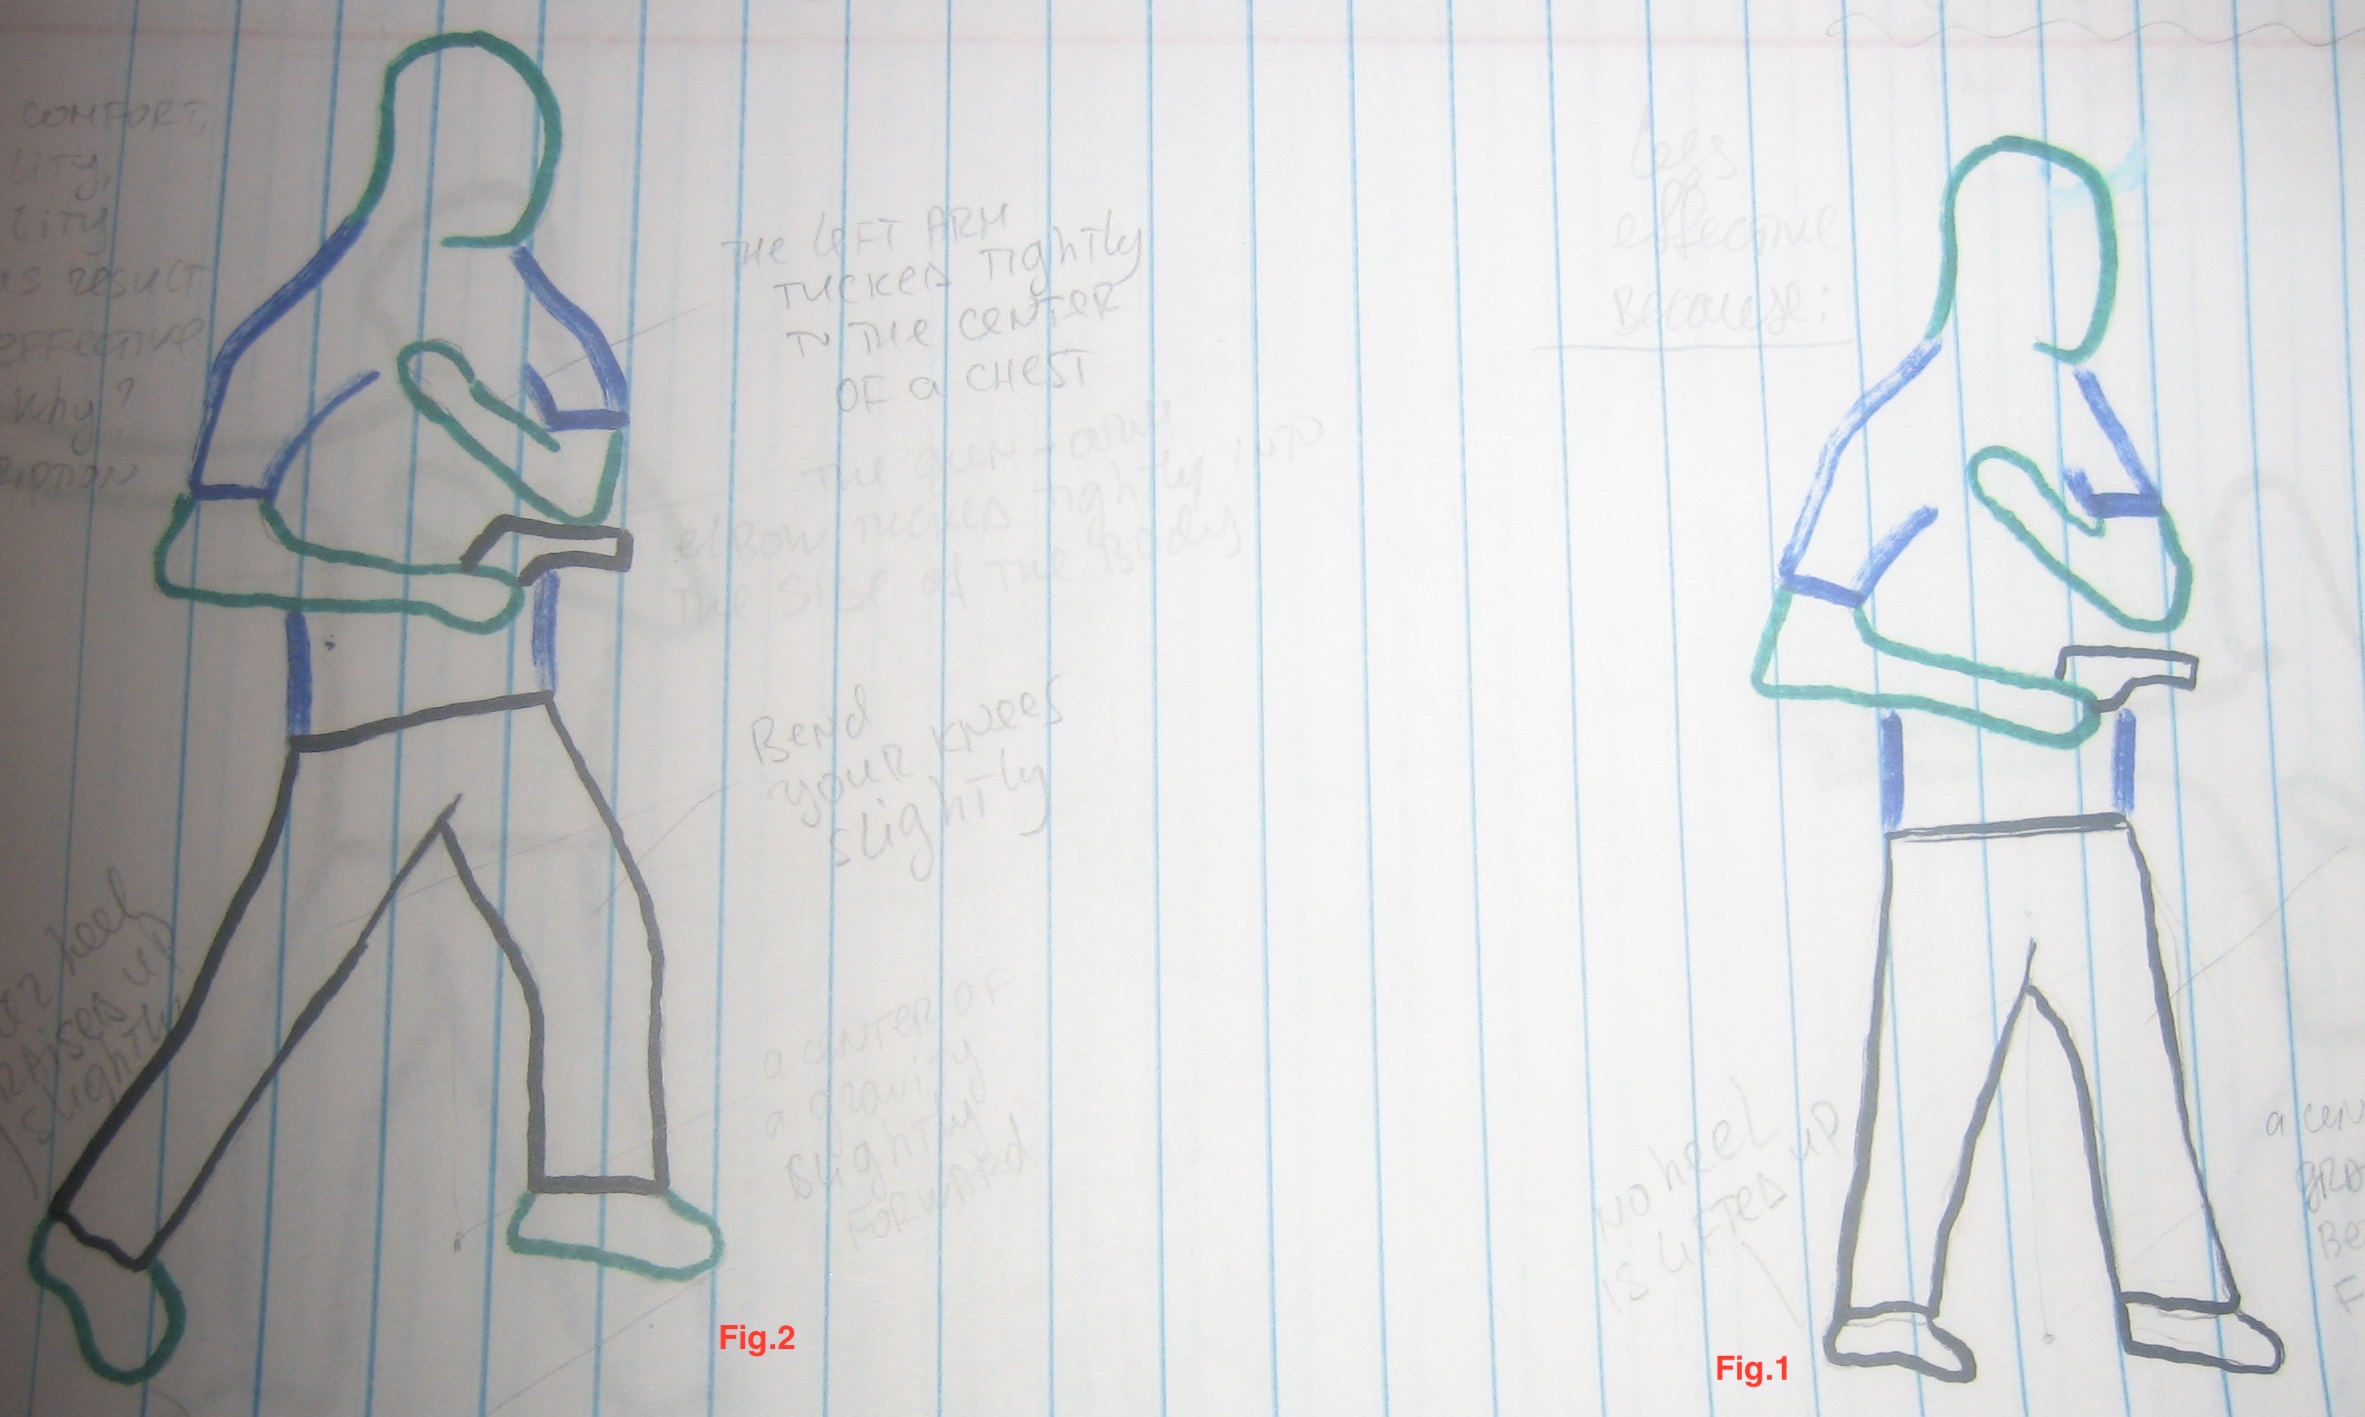
Figure 2
More comfort, stability, and mobility. As result it is more effective stance. Because:
- The leading hand tucked tightly to the center of chest
- The gun arm elbow tucked tightly into the side of the body
- The rear heel slightly lifted up
- The feet are set shoulder width
Figure 1 or the stance created before:

Less effective because:
- The legs are straight
- No heel is raised up
- The weight supported equally by both legs
The modified natural stance (see Fig.2) compare with a stance created before ( see Fig.1)
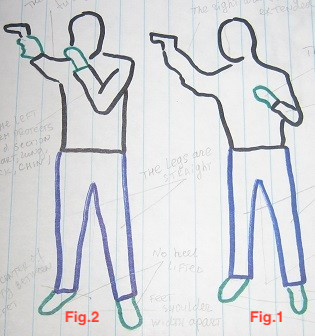
Figure 2
- A center of gravity supported equally by both legs
- No heel is raised up
- The feet are set shoulder width apart
- The legs are straight
- The left arm protects mid-section (lung, heart, neck)
- The right arm fully extended with the pistol
Advantage: Comfort and covered vital points
Disadvantage: It might be harder to have trigger and recoil control
Figure 1
- A center of gravity slightly forward
- The legs are straight
- No heel is raised up
- The feet are set shoulder width apart
- The left hand tucked tightly to the center of the chest
- The first of the left hand clenched and palm of that hand be facing upward
- The right arm fully extended
Disadvantage: Uncovered vital points
Advantage: Better trigger and recoil control
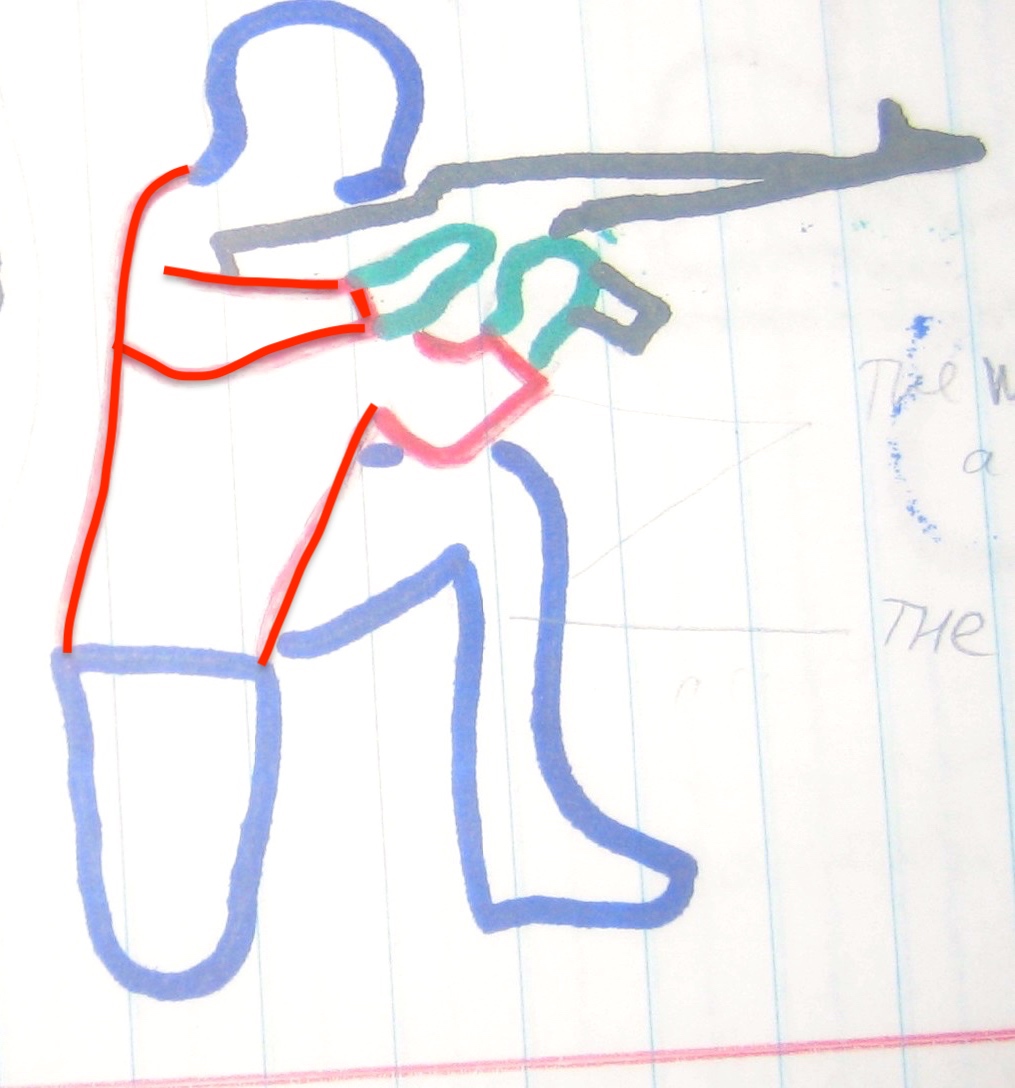
The modified stance (Fig.2). Compare with a stance developed before (Fig.1)
The front stance stance (see Fig.2)
More comfort, stability, mobility, and as a result more effective stance because:
- Bend your knees slightly
- A center of gravity slightly forward or between both feet
- The feet should be about shoulder width or slightly wider
- Toes outward at 45-degree angles
- The none shooting hand tucked tightly to the center of the chest
- The right arm with the pistol fully extended towards the target
Figure 1 or the stance developed before
Less comfort, mobility, stability and as result less effective because:
- The legs are straight
- No heel is raised up
- The weight supported equally by both legs
The modified stances
A) The front stance
- The right side of body (the strong side) towards the target
- Bend your knees slightly
- The rear heel slightly lifted up
- A center of gravity slightly forward
- The feet are set shoulder width
- The left arm protects your mid-section and at the same time stabilizes and controls your leading hand with the pistol.
B) The side stance ( Fig.1)
- The feet should be about shoulder width
- Toes outward at 45 degree angles
- The legs are straight or slightly bent
- The right side ( the strong side ) of body forward
- The rear heel slightly raised up
- A center of gravity slightly forward
- The left arm protects mid-section and it holds your body
The modified stance ( Fig.2). Compare it with a stance developed before (see Fig.1)
Figure 2
More effective because:
- Bend your knees slightly
- A center of gravity slightly forward
- The feet are set shoulder width or slightly wider
- The weak side ( left side ) of the body forward
- The rear heel slightly lifted up
- Both hand with the pistol extended
- The left arm partly extended
Figure 1
Less effective because:
- No heel is lifted up
- The weight is on the right foot or supported equally by both feet
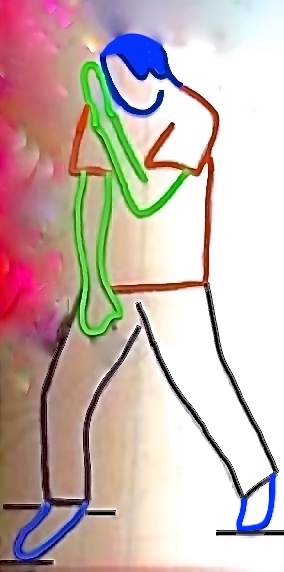
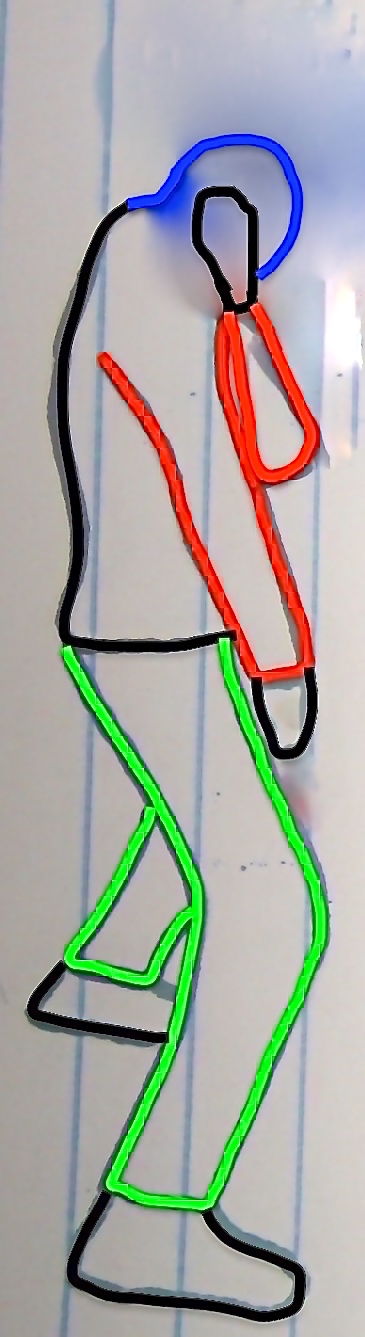
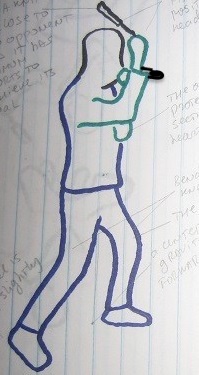
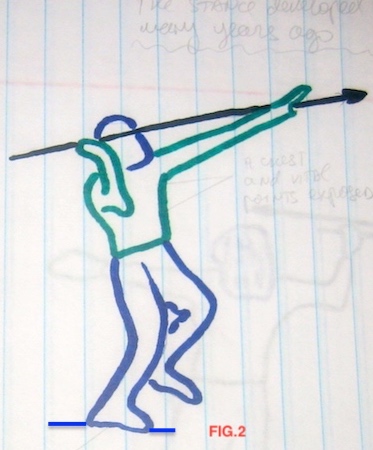
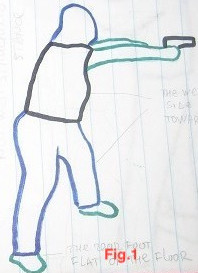
Compare the way of shooting shown in Fig.3 and Fig.4 with Fig.2 and Fig.1
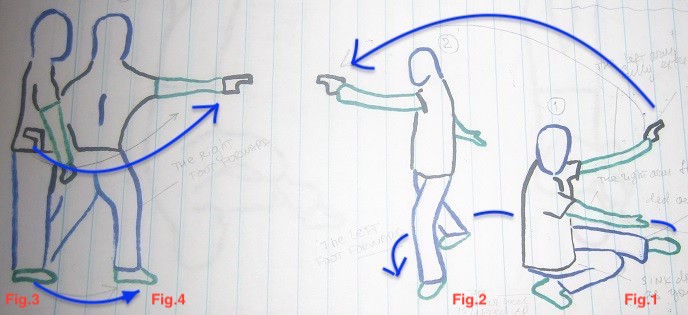
In the Fig.3 and Fig.4 you’ll see the effective way to throw a hand with pistol towards the opponent like in the western movies of 60s. It is effective because you don’t need several steps before pulling a trigger. In the Fig.1 and Fig.2 you can see a one of the most ineffective (useless) ways to point a gun and shoot the opponent, which I have invented by scientific approach. You need to stand up and turn to the opponent before making a shot. When you are doing it your left hand with a pistol making a circle from top to the bottom.
The modified stance

- The rear heel slightly raised up
- A center of gravity slightly forward
- Bend your knees slightly
- The strong side ( right) of body towards the target
- The left arm protects mid-section ( lung, heart, neck)
- Bring the right hand so that it is adjacent to your hip
- The feet are set shoulder width apart
- The pistol pointing the target
The modified stance
- The rear heel slightly raised up
- A center of gravity slightly forward
- Bend your knees slightly
- The weak side ( left ) of body towards the target
- The left arm ( leading hand) protects mid-section ( lung, heart, neck)
- Bring the right hand so that it is adjacent to your hip
- The feet are set shoulder width apart
- The pistol pointing the target
The modified stance
- Bend your knees slightly
- A center of gravity slightly forward
- The rear heel slightly lifted up
- The feet are set shoulder width
- The right foot forward
- The strong side of body forward
- The lead arm ( right arm) held lower and covers the lead side of body
- The pistol pointing at the floor
The modified stance

- Bend your knees slightly
- A center of gravity slightly forward
- The rear heel slightly lifted up
- The feet are set shoulder width
- The right foot forward
- The strong side of body forward
- The right arm ( the leading hand ) covers the lead side of body
- The pistol pointing to the sky
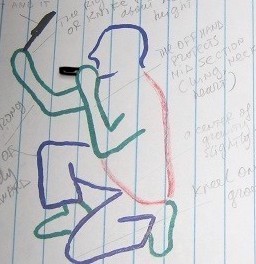
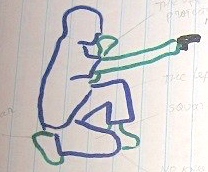
The modified kneeling stance

- The left arm protects mid-section ( lung, heart, neck)
- The right foot forward
- The kneel on the ground
- The rear heel is lifted up
- The right hand extended with the pistol
The modified left side stance (kneeling position)
- The left foot forward
- The knee does not touch the ground
- The rear heel is lifted up
- The left hand protects mid-section ( lung, heart, neck)
- The right hand extended with the pistol
The modified left side stance (kneeling stance)
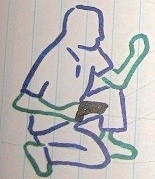
- Bring the right hand so that it is adjacent to your hip
- The left foot forward
- The right knee does not touch the ground
- The left arm covers the left side of the body. The elbow of the left arm on the left knee
- The rear heel is lifted up
The modified stance

- The none dominant hand protects mid-section (lung, heart, neck)
- A knee on the ground
- The strong side of body forward
- The right foot forward
The modified natural stance

- The legs are straight
- No heel is lifted up
- The feet close together
- The left arm protects mid-section ( lung, heart, neck)
- The right hand with the gun pointing the gun over the shoulder
The new stance with a pistol

- The weak side of body forward
- The feet are set shoulder width apart
- Bend your knees slightly
- The feet parallel or toes outward at 45 degree angles
- Bring your right hand with the gun so that a gun pointing at the sky
- Bring the left arm so that it is adjacent to your hip
- The left palm turned upward
- The left foot forward
- The weight supported equally by both legs
Notice: The stance from a one of the fundamental martial arts or concepts ” mixing the medium techniques of all martial arts”. You can see the medium distance between you and an opponent, and a way to throw a hand with weapon towards the opponent (pistol).
© 1999-2016 Tamerlan A Kuzgov


![NET2[1] 2](https://hardfightmartialart.files.wordpress.com/2018/07/net21-2.jpg)
![NET4[1] 2.jpg](https://hardfightmartialart.files.wordpress.com/2018/07/net41-2-1.jpg)